

Perfect for your Christmas trip.
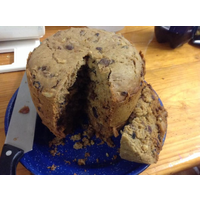
Boiled Fruit and nut pudding
Category Camp Oven Cooking
Author:Brad Lumb
Perfect for your Christmas trip.
Ingredients
- 3
- Cups SR Flour
- 1 Cup Brown Sugar
- 2 Eggs
- 1 Teas Bicarb Soda Dissolved in 3 tablespoons
- hot water
- 1/2 Cup Rum ( or more to taste I used 3/4 cup
- )
- 1 Teas Vanilla Essence
- 1 Teas Nutmeg
- 1 Teas Mixed Spice
- 1/4 Cup of Slivered Almonds
- 1 x 200g packed Glace Cherries
- 1 Box of Mixed Fruit or 3 Cups
- 1/4 cup of Milk ( Add more at the end if Mixture is to dry as
- it should be thick and sticky , or add bit more flour if mixture is too runny)
- 4 Tablespoons of Oil
- Canola , olive etc , or
- 150 g of Butter can be used instead
Directions
Pudding Basin Method
- Place all Fruit and rum in a small saucepan over the heat diffuser and heat until hot but not boiling.
- Remove from heat and stir then let sit for 20min to soak in the rum this can be done over night as well.
- Add fruit and rest of Ingredients to a mixing bowl and mix well (if you are using butter instead of oil melt this first).
- Place Mixture in a Large Metal Pudding basin. Make sure the mixture is no higher than 3/4 up the sides to allow for rising,cut a round piece of Baking paper and place on pudding mixture then clip on basin lid firmly.
- Place pudding in a camp oven on a trivet.
- Add Boiling water to the camp oven to reach 3/4 of the way up the outside of basin , place lid on camp oven and have the water on a steady Simmer boiling pudding for 3 hrs topping up the water as needed.
- If you don't have a pudding basin you can use do a Traditional Boiled Cloth Pudding as below:
Traditional Cloth Bag Method
- Boil a calico cloth in water for 2 minutes. Remove cloth. Squeeze out excess water and spread cloth on bench.
- Rub 1/4 cup plain flour into centre of cloth to cover around 40cm in diameter.
- Place pudding mixture in centre of cloth. Gather cloth around pudding, avoiding deep pleats. Tie cloth tightly with string about 2cm above mixture to allow for expansion .
- Place pudding in a camp oven on trivet then add enough boiling water to come up to just below the String then hang the Tail of the Pudding over the side of the camp oven a couple of cm and spread out so lid can can go on.
- Keep checking the water level and top up as needed , boil for 3 hrs until pudding is firm to touch.
- Once cooked remove pudding from water. Place in a colander. Remove string and carefully start peeling back cloth, scraping the 'skin' back onto the pudding with a knife if necessary. Invert pudding onto a plate.
- Peel cloth away completely.
- Stand for 15 minutes.
- Serve.
Oven bag method
- Lightly flour the inside of an medium oven bag with a tablespoon of flour. Hold top closed and shake bag then tip out the excess flour.
- Place pudding mixture inside the bag. IMPORTANT~ Using a rubber band or twist tie, seal the bag at the top, but first first squeeze out all of the air to allow for expansion.
- Place Pudding mixture inside a small steel or Pyrex/oven proof bowl so it keeps its round shape while cooking then place this bowl in a camp oven. (you may just put the whole bag into the camp oven but the shape won't be a traditional pudding shape.
- Add boiling water.
- Place lid on the camp oven and simmer for 3 hours keeping the water level topped up.
What our customers say


Shop Now. Pay Later.
Always interest-free.

Add your favourites to cart

Select Afterpay at checkout

Log into or create your Afterpay account, with instant approval decision

Your purchase will be split into 4 payments, payable every 2 weeks
All you need to apply is to have a debit or credit card, to be over 18 years of age, and to be a resident of country offering Afterpay
Late fees and additional eligibility criteria apply. The first payment may be due at the time of purchase
For complete terms visit afterpay.com/terms