

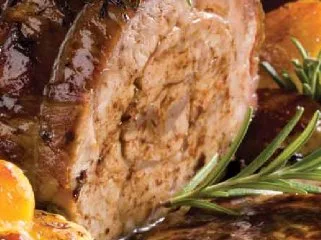
Set up chairs around the Ozpig & carve your roast straight from the camp oven while enjoying a nice bottle of red or a beer.
Camp Oven Roast
Category Camp Oven Cooking
Author:Assunta
Set up chairs around the Ozpig & carve your roast straight from the camp oven while enjoying a nice bottle of red or a beer.
Ingredients
- Beef, pork, lamb, chicken, venison etc. roast portion.
- Potatoes, sweet potatoes, other vegies to you preference.
- Garlic
- Oil - optional
Directions
- Prepare your beef, lamb, pork, chicken etc. by making small incisions into the meat &
- placing sliced cloves of garlic into these cuts.
- Peel &
- cut potatoes in half, &
- slice sweet potato portions to about same size as the half potatoes.
- Position your camp oven (with a cake rack or trivet inside) over the open firebox of the Ozpig to pre-heat for 5 to 10 minutes, or until very hot.
- Place your meat into the camp oven dry (no oil or water required) and leave over the open fire box for about 10 to 15 minutes.
- Spray or coat the potatoes and sweet potato in a light amount of oil, then add them into the camp oven (this is optional).
QUICK ROAST
- Leave the camp oven over the open fire box for a further 10 to 15 minutes, then put the DIFFUSER between the camp oven and the open flames. Cook with the camp oven in this position until the meat is to your liking.
SLOW ROAST
- Leave the camp oven over the open fire box for 10 minutes, then put the DIFFUSER between the camp oven and the open flames. Let the roast remain in this position (with the diffuser) for a further 30 to 40 minutes. Transfer the camp oven to the lower side warming plate ensuring that the camp oven body is in contact with the Ozpig body (this allows enough heat transfer for the roast to continue slow cooking). Cook for a further 3 to 4 hours in this position, remembering to rotate the camp oven 180 degrees every 30 minutes.
TIPS
- Times can vary according to the size of the roast &
- how many times you lift the lid on the camp oven.
What our customers say


Shop Now. Pay Later.
Always interest-free.

Add your favourites to cart

Select Afterpay at checkout

Log into or create your Afterpay account, with instant approval decision

Your purchase will be split into 4 payments, payable every 2 weeks
All you need to apply is to have a debit or credit card, to be over 18 years of age, and to be a resident of country offering Afterpay
Late fees and additional eligibility criteria apply. The first payment may be due at the time of purchase
For complete terms visit afterpay.com/terms